~WELCOME~(̾●̮̮̃̾•̃̾) ̿ ̿ ‘̿’\̵͇̿̿\З=(•̪●)=Ε/̵͇̿̿/’̿’̿̿̿̿ ̿ ̿ (̾●̮̮̃̾•̃̾)~WELCOME~

Natural henna has been used by many civilizations for over 7000 years. Traditionally, henna was applied for special occasions such as marriages, births, and for certain religious occasions. Henna is now used at any time. Natural henna is a greenish brown paste made of plant matter, lemon juice, and essential oils (like lavender or tea tree oil). Henna is put on the skin and allowed to stay on for several hours. When removed, it creates a reddish-brown stain that will easily last 7 to 10 days (and can last up to three weeks, depending on your skin type). WARNING: Henna is NOT black. If you ever see someone using black henna, do NOT allow it to be put on your skin. Black henna contains PPD (an ingredient found in hair dye) and can cause serious burns. Any henna photos on this site appearing black are while the paste is still on the skin.

Thursday, January 27, 2011

Tuesday, January 25, 2011

Hands on - Henna

Hands on - Henna

By drawing around your hands, you can make a template on which to create your own stunning mehndi designs. It's clean and fun and you can try as many different patterns as you like.

Trace your hand

Photograph of a person tracing around their hand
Take a square piece of paper measuring about 15cm by 15cm (or big enough to fit the palm of your hand on!).


With a pencil, carefully trace around your hand. This is your template. You can go over your hand outline with a pen if you want to make it bolder. You're now ready to start designing.

Create your designs

Photograph of a mehndi pattern being drawn onto a hand template
Traditional mehndi art tends to be very fine lines based on pasley, flower of leaf motifs. But there are no strict guidelines and you can draw exactly what you want. Try using plants, animals and abstract shapes like stars or hearts.


Use a pencil to try out your designs first. If you want to make lots of them, either photocopy your hand outline, or draw more outlines on new pieces of paper.

For inspiration, you might want to check out some designs from the websites listed below.


  • This link to a website called the Henna Page gives lots of free designs for both hands and feet


  • This website shows many designs from a leading henna artist


  • Colour your designs

    Photograph of a mehndi pattern being penned onto paper
    Once you've settled on your design, and have drawn it out fully onto your hand template using a pencil, you can go over the lines to make them permanent.

    You can use a brown felt-tip pen or paint or any colour you wish really. You don't have to stick to shades of brown. You can even block in bits of your pattern using pen or paint.


    Take note!
    If you would like to do real henna painting on your hands, first check with your parents. Bear in mind that henna tattoos stain the skin and can last for several days. Very importantly, avoid black henna. This isn't really true henna, but is a chemical dye known as black henna. It can cause blistering, sores and serious scarring. See our henna pages for more information on this.


    DESIGN PAPER


    Caring For Your favourite Design

    Caring For Your Favourite Design

    How do you ensure the darkest stain results for henna body art? How can we make sure we get that rich, red-brown stain? At times it will even be as dark as black cherries. The number one item needed for dark results is fresh brand powder. So choose the best brand powder for body art possible.
    Following these simple steps will guide you to a dark, rich stain.
    1. Once dry, spray or dab with lemon & sugar mixture. Allow to dry.
    2. Wrap you design in toilet paper, medical tape, or sealant. Keep warm.
    3. Let design sit for 4 to 6 hours, or overnight for best results.
    4. Remove paste, and apply henna balm
    5. Avoid contact with water for 8 to 24 hours to ensure a beautiful stain.
    6. Design will appear light in color at first, as it takes up to 2


    p.s~ GOODLUCK!

    Henna Paste Recipe.


    Henna has been used for centuries by people for body art and/or hair. Using a 100% natural product is the best way to go, and always brings memorable times with its use. This recipe is best used for body art.

    Essential ingredients:
    • Fresh body art quality henna powder that is finely sifted (please read our article on the times needed for dye release).
    • Bottled lemon juice, warm water or tea brew.
    • 100% pure essential oils, such as eucalyptus globulus, cajeput, or tea tree or lavender (also known as terps).
    • Sugar, preferably dextrose or fructose.
    1. Measuring the henna powder. Take 2 tbsp of henna powder (about 25 grams of henna), and put it into a bowl. Add 1 tsp of sugar of your choice, and mix well.
    2. Adding the lemon juice/water/tea brew. Heat your liquid (about 1/4 cup) on the stove or in your microwave, and add it slowly to your henna powder. Mix well until it is the consistency of play dough/ mashed potatoes. Cover your bowl and let it sit for 2-12 hours (depending on henna powder chosen).
    3. Adding essential oil. Then add 1-1.5 tsp of “terps” (essential oil). Cover again and let it sit for another 6-12 hours. Please make sure to read the article on how to choose the right henna powder for body art as it explains how different henna powders have different sitting periods to achieve proper dye release.
    4. Testing the paste. Test your henna paste periodically by placing a bit of paste onto your palm and let it sit for 1 minute. Remove the paste by washing off, and see if you have a bright pumpkin orange stain indicating that it is ready to use.
    5. Second round of lemon juice/water. Add more lemon juice/water (not warmed up) a little at a time and mix well. Do this until you have it to the consistency of toothpaste.
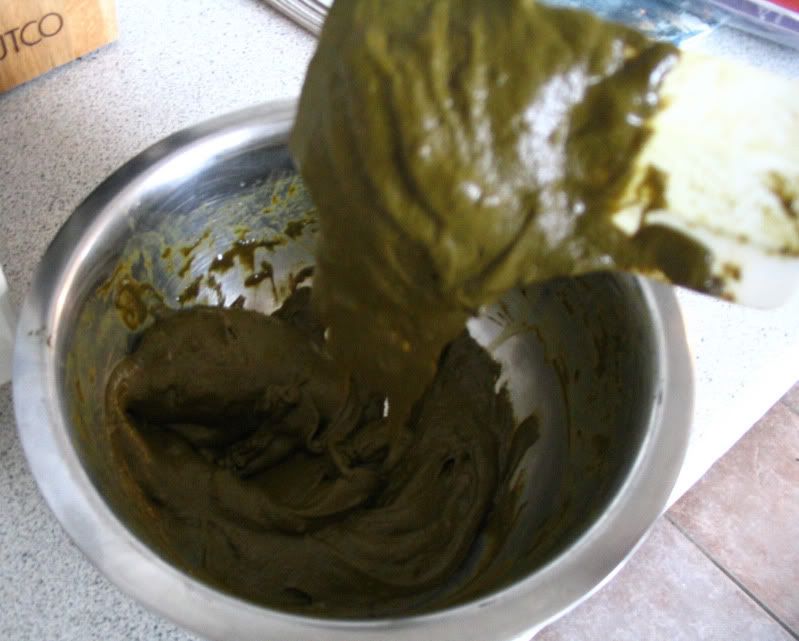
    Freshly Mixed Henna Paste
    Additional Tips:
    • Straining your henna paste makes it extra smooth. You can do this by taking a large cup and placing a carrot bag inside, and then putting a cheap nylon stocking inside that. You then pour the henna paste into the stocking’s opening and pull the stocking through the carrot bag. That way, the henna paste is forced to come through the nylon stocking into the carrot bag. It will be extremely smooth and you won’t have any clogs in your fine tips or cones. What is also good about this method is that, once the henna paste is in the carrot bag, you can easily use that to fill all your applicators up.
    • Test your henna paste for dye release as well. Read our article: How to Test your Henna Paste for Dye Release.
    • Please do read our aftercare article on taking care of your henna design, to ensure best results.

    please submit

    Do you satisfied enough with the info provided?
    Please update my blog for further details.
    Name:
    Email Address:

    Click here to create your own form.