This section will regularly have new pattern exercises designed to help beginners become proficient henna artists, and to help experienced henna artists increase speed and accuracy.
Once, when you were very young, you had difficulty writing. You practiced on lined paper until you could write easily, legibly, and quickly. Henna patterns can be created of simple elements just as words are created of letters. If you learn the elements, you can put them together to make complex patterns. Practice these exercises with lined paper and a pen until you can draw the figures quickly and smoothly, just as you practiced elementary school penmanship exercises. Then practice them with a henna cone. In time, you'll be able to build up complex henna patterns quickly and easily. Bookmark this page and come back often for more free patterns from The Henna Page!
Click on the images below for more pictures and free patterns!
The "Bridal Henna" Series
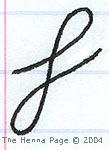 1: The Fooffy:
This looptyloop is similar to the cursive letter "f."
Click on the Fooffy to see what you can do with it!

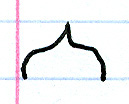
2: The Hump:
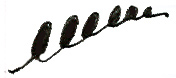
3: The WibbleLeafThis leaf is created with a wibble and a flick. Henna that is naturally stringy or which has had dextrose added makes these WibbleLeaves go smooth and fast. Wibble up, Wibble down, Wibble around a spiral!
Click on the WibbleLeaf to learn wibbling!

4: The ZiggyZoggyThe ZiggyZoggy is most easily done with naturally stringy henna, or henna with added dextrose. If you have stringy paste, you only need to touch down at the apex and nadir of each angle and drape between. North African patterns use lots of ZiggyZoggies! In India, repeating ZiggyZoggies symbolize the rainy season, water, fertility, and abundance. Learn your ZiggyZoggy!
Click on the ZiggyZoggy to learn how!

5: The FishboneThe Fishbone is most easily done with naturally stringy henna, or henna with added dextrose, so you can drape fine and straight fishbones . Fishbones are great "filler" patterns between longer lines.
Click on the Fishbone to learn how!

6: The Mummy

7: The Sprout
8) The GameThe Game is a depiction of a game board, symbol of merriment, leisure time, and games of strategy and chance. This pattern has been a favorite in Indian henna for over 100 years, and continues to be popular in contemporary bridal henna.
Click on the Game to learn how!
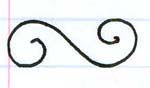
9) The ?S?S?This pattern is variously interpreted as a vine, meander, pot hook, or a scorpion. As a scorpion, it may have either passionate or deadly associations ... or both!
Click on the ?S?S?S to get passionate and deadly ... or to just hang your cooking pot over the fire!

10) The Bud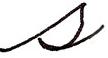
11) The Cursive S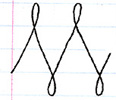
12) Sloopy
13) Tribbles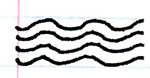
14) Ripples
15) The Kiss
16) The Knot
17) The Open Heart
 18) Kitty Whiskers.
Got Tuna? Click
here or on the whiskers to see whisker wonderfulness!

19) Pug Tails

20) The SeedThe "North African" Series
Introduction to "North African" style henna
Triangles: Tanith, The Bride, and the Eye
Eight-Pointed Stars: Venus
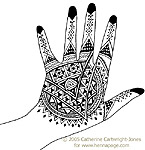
 Take a square piece of paper measuring about 15cm by 15cm (or big enough to fit the palm of your hand on!).
 Traditional mehndi art tends to be very fine lines based on pasley, flower of leaf motifs. But there are no strict guidelines and you can draw exactly what you want. Try using plants, animals and abstract shapes like stars or hearts.


